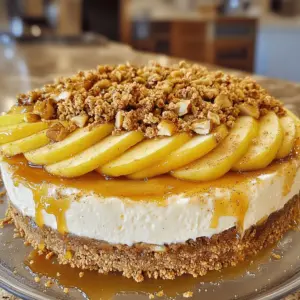
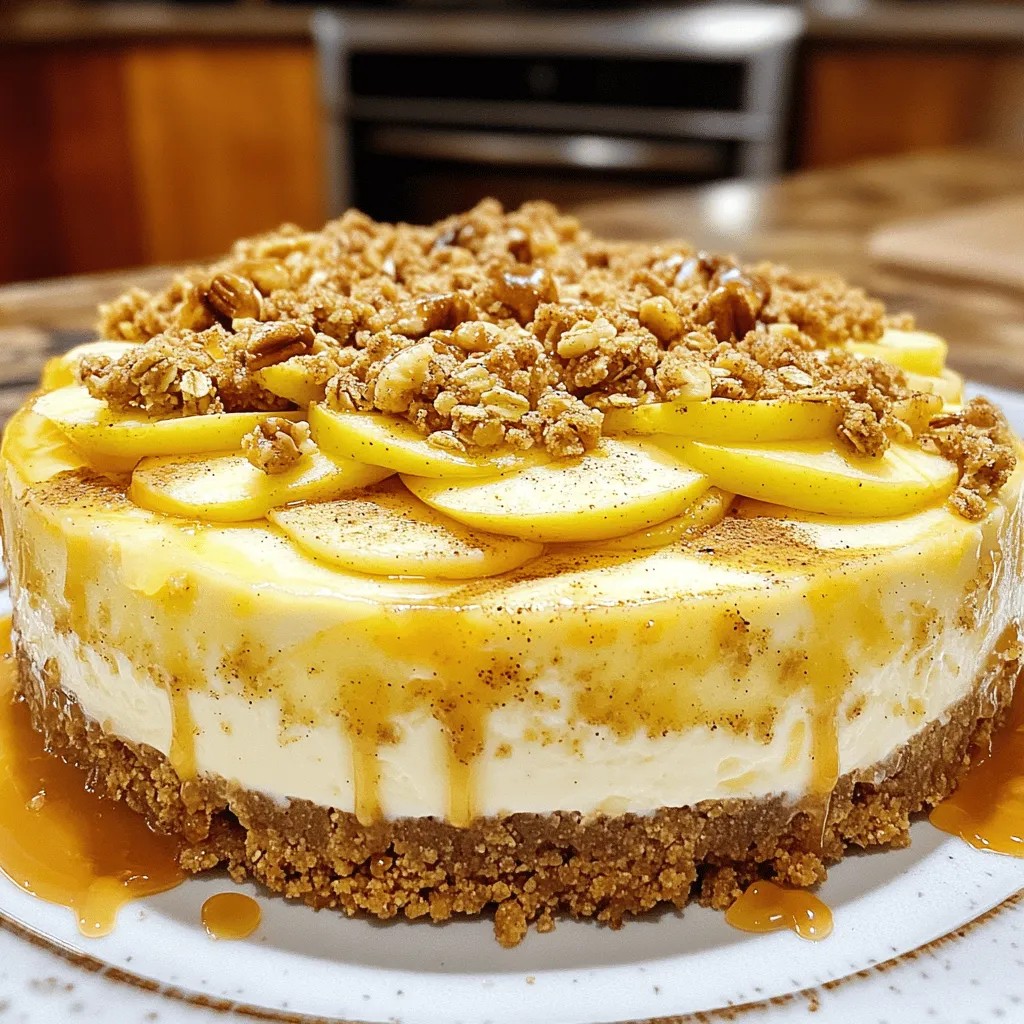
Craving something sweet and comforting? You’re in the right place! My delicious apple crumble cheesecake combines creamy goodness with crispy topping. This easy recipe will satisfy your taste buds while impressing your friends and family. In this blog, I’ll guide you through every step, from selecting the best apples to storing leftovers. Let’s dive into this tasty dessert adventure together and make your kitchen the place to be!
Ingredients
List of Ingredients for Apple Crumble Cheesecake
– 2 cups graham cracker crumbs
– 1/2 cup unsalted butter, melted
– 1/4 cup granulated sugar
– 4 packages (8 oz each) cream cheese, softened
– 1 cup granulated sugar (for cheesecake filling)
– 1 teaspoon pure vanilla extract
– 4 large eggs, at room temperature
– 4 medium apples, peeled, cored, and thinly sliced
– 1 teaspoon ground cinnamon
– 1/4 teaspoon ground nutmeg
– 1/4 cup packed light brown sugar
– 1/2 cup rolled oats
– 1/2 cup chopped walnuts or pecans
– 1/4 cup all-purpose flour
Ingredient Substitutions
You can swap some ingredients in this recipe. If you need a gluten-free option, use gluten-free graham cracker crumbs. For a dairy-free cheesecake, try vegan cream cheese. Replace granulated sugar with coconut sugar for a healthier option. If you have allergies to nuts, you can skip the walnuts or pecans altogether.
Tips for Selecting the Best Apples
When choosing apples, go for firm and crisp varieties. Honeycrisp and Granny Smith are great for this recipe. They give a nice balance of sweetness and tartness. Look for apples with smooth skin and no bruises. If you can, pick them in the fall season for the best flavor. Fresh apples make the cheesecake taste brighter and more delicious.
Step-by-Step Instructions
Preparing the Crust
To make the crust, grab a large mixing bowl. Combine 2 cups of graham cracker crumbs, 1/2 cup of melted unsalted butter, and 1/4 cup of granulated sugar. Mix these well until the crumbs look moist. Next, press the mixture into a 9-inch springform pan. Make sure it is even and compact. Once done, set the crust aside for now.
Making the Cheesecake Filling
In a separate large bowl, use a hand mixer or stand mixer. Beat 4 packages of softened cream cheese until it is smooth and creamy. Slowly add 1 cup of granulated sugar while mixing. Once blended, add in 1 teaspoon of pure vanilla extract and mix until combined. Now, add 4 large eggs, one at a time, mixing on low speed. This helps keep the filling creamy. Do not overmix.
Layering the Ingredients
First, take half of the cheesecake mixture and pour it over your crust. Spread it evenly across the top. Next, take half of the apple filling, which you made earlier, and layer it over the cheesecake. Now, pour the rest of the cheesecake mixture on top of the apples. Finally, add the remaining apple filling on top of the cheesecake. This creates a lovely layered look that makes your cheesecake extra special.
Tips & Tricks
Avoiding Common Mistakes
To make a perfect Apple Crumble Cheesecake, pay close attention. Here are some tips:
– Don’t overmix the eggs. Mix each egg until just blended. Overmixing can make the cheesecake dense.
– Use room temperature cream cheese. Cold cream cheese will not blend well. It can lead to lumps in your filling.
– Pre-bake the crust. A short bake helps it set and stay firm. This avoids a soggy bottom.
– Check the oven temperature. An oven that is too hot can crack your cheesecake. Use an oven thermometer for accuracy.
Serving Suggestions and Presentation Ideas
Presentation matters! Here are ways to make your cheesecake beautiful:
– Use a sharp knife for slicing. Dip it in hot water, then wipe it dry. This creates clean edges.
– Top with whipped cream. A dollop adds a nice touch. You can also sprinkle cinnamon for color.
– Add caramel sauce. Drizzle warm caramel over each slice for extra sweetness. This creates a lovely contrast to the tart apples.
– Serve with vanilla ice cream. The cold ice cream pairs wonderfully with the warm cheesecake.
Tools and Equipment Needed
Here are the tools you’ll need to make this cheesecake:
– 9-inch springform pan: This allows easy release of the cheesecake.
– Mixing bowls: Have a few on hand for different layers.
– Hand mixer or stand mixer: This helps blend your ingredients smoothly.
– Spatula: Great for spreading the cheesecake and layers evenly.
– Measuring cups and spoons: Accurate measurements are key to success.
– Sharp knife: For slicing the cheesecake cleanly.
These tips will help you create a stunning Apple Crumble Cheesecake every time!
Variations
Gluten-Free Apple Crumble Cheesecake
You can easily make this cheesecake gluten-free. Use gluten-free graham cracker crumbs for the crust. Check the labels to ensure they are truly gluten-free. Instead of all-purpose flour in the crumble topping, use almond flour or coconut flour. These options add flavor and keep the texture right.
Adding Different Fruits and Flavors
Feel free to be creative! You can swap apples for pears or peaches. Both fruits pair well with cinnamon and nutmeg. If you want a tropical twist, try adding diced pineapple or mango. Mixing in berries like blueberries or raspberries will also add a pop of color and flavor. Just adjust the sugar to balance the tartness of the fruit.
Alternative Toppings and Mix-ins
For toppings, think outside the box! You could drizzle chocolate sauce or caramel sauce over each slice. Adding a layer of whipped cream makes it even richer. You might also sprinkle some toasted coconut or chopped nuts on top. If you like a crunch, try adding crushed cookies or granola for extra texture.
Storage Info
How to Store Leftover Cheesecake
To store leftover cheesecake, cover it tightly with plastic wrap. You can also use a cake dome or an airtight container. This helps keep the cheesecake fresh. Place it in the refrigerator. It will stay good for about 5 days. If you want to enjoy it later, freezing is a great option.
Freezing the Apple Crumble Cheesecake
Freezing is simple. First, let the cheesecake cool completely. Slice it into portions for easy serving. Wrap each slice in plastic wrap. Then place the wrapped slices in a freezer-safe bag or container. Be sure to label it with the date. The cheesecake can be frozen for up to 3 months. When you’re ready to eat, just thaw it in the fridge overnight.
Reheating Instructions
If you want to warm the cheesecake, you can do so carefully. Preheat your oven to 300°F (150°C). Place the cheesecake on a baking sheet. Heat it for about 10-15 minutes. This will bring out the flavors. You can also use the microwave. Just heat a slice for about 15-20 seconds. Be careful not to overheat it, or it may get too soft. Enjoy your cheesecake warm or cold!
FAQs
How long does Apple Crumble Cheesecake last?
Apple crumble cheesecake can last for about 5 days in the fridge. To keep it fresh, cover it tightly with plastic wrap or foil. This helps prevent it from drying out or absorbing other smells from the fridge.
Can I make this cheesecake ahead of time?
Yes, you can make this cheesecake ahead of time. It is best to chill it overnight. This gives the flavors time to meld. You can serve it the next day for a great dessert.
What can I substitute for cream cheese?
You can use mascarpone or ricotta cheese as a substitute for cream cheese. Both options offer a creamy texture. They also provide a slightly different flavor, which can add a nice twist to your cheesecake.
Is it possible to make a dairy-free version of this dessert?
Yes, you can make a dairy-free version. Use dairy-free cream cheese or cashew cream. For the butter in the crust, opt for a dairy-free spread. These substitutes will keep the cheesecake creamy and delicious.
Why is my cheesecake cracking?
Cheesecakes can crack for a few reasons. Overmixing the batter can add too much air. Another reason is baking at too high a temperature. To avoid cracks, bake at a low temperature and let it cool slowly in the oven.
This blog post covered how to make a tasty Apple Crumble Cheesecake. I shared the ingredients you need, substitutions you can use, and tips for choosing the right apples. We walked through the steps for preparing the crust, filling, and layering. I included useful tips to help avoid mistakes and make your dessert look great. If you want to try variations, I shared ideas for gluten-free options and new toppings. Finally, I covered how to store leftovers and answered common questions. Now, you can enjoy this dessert with confidence!