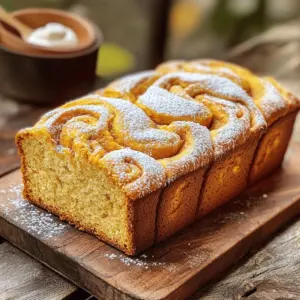
Craving that cozy Starbucks pumpkin bread? In this post, I’ll show you how to make it at home with a deliciously simple recipe. You’ll find easy steps, tips for the best texture, and fun variations to fit your tastes. Whether you’re a baking pro or a newbie, this bread will impress your friends and family. Let’s dive into the sweet, spiced world of pumpkin goodness!
Ingredients
Dry Ingredients List
– 1 ½ cups all-purpose flour
– 1 teaspoon baking powder
– 1 teaspoon baking soda
– ½ teaspoon salt
– 1 teaspoon ground cinnamon
– ½ teaspoon ground nutmeg
– ½ teaspoon ground ginger
Wet Ingredients List
– ⅓ cup vegetable oil
– 1 cup granulated sugar
– 2 large eggs
– 1 cup pumpkin puree (canned or homemade)
– ½ cup Greek yogurt
– 1 teaspoon vanilla extract
Optional Add-Ins
– ½ cup chopped walnuts or pecans
– ½ cup chocolate chips
In this recipe, each ingredient plays a key role. The all-purpose flour gives the bread structure. Baking powder and soda help it rise. Salt enhances all the flavors. The spices—cinnamon, nutmeg, and ginger—bring warmth and aroma.
For the wet ingredients, vegetable oil keeps the bread moist. Granulated sugar sweetens it perfectly. Eggs provide richness. Pumpkin puree adds flavor and color. Greek yogurt makes the bread tender and adds a slight tang. Vanilla extract rounds it all out with a lovely scent.
Feel free to customize your loaf! Adding walnuts or pecans gives a nice crunch. Chocolate chips add a sweet surprise. You can mix and match these add-ins to make the bread your own.
Step-by-Step Instructions
Prepping the Oven and Loaf Pan
First, set your oven to 350°F (175°C). This step warms the oven for even baking. Next, get your 9×5 inch loaf pan ready. Grease it well, or line it with parchment paper. This helps the bread release easily once baked.
Mixing Dry Ingredients
In a medium bowl, add 1 ½ cups of all-purpose flour, 1 teaspoon of baking powder, and 1 teaspoon of baking soda. Then, sprinkle in ½ teaspoon of salt, 1 teaspoon of ground cinnamon, ½ teaspoon of ground nutmeg, and ½ teaspoon of ground ginger. Whisk these together until mixed. This mixture adds flavor and helps the bread rise.
Preparing the Wet Mixture
In a large bowl, pour in ⅓ cup of vegetable oil and 1 cup of granulated sugar. Use a whisk or mixer to blend this until smooth. Then, add 2 large eggs, one at a time. Mix well after each egg to keep the texture creamy. Next, fold in 1 cup of pumpkin puree, ½ cup of Greek yogurt, and 1 teaspoon of vanilla extract. Stir gently until the mixture is smooth.
Combining the Mixtures
Now, it’s time to bring the dry and wet mixtures together. Gradually add the dry mix to the wet mix. Use a spatula to stir gently. Stop mixing as soon as you don’t see any dry flour. Overmixing can make the bread dense, so be careful.
Baking the Pumpkin Bread
Pour the batter into your prepared loaf pan. Use a spatula to smooth the top. Then, place the pan in the oven. Bake for 55-65 minutes. To check if it’s done, insert a toothpick into the center. It should come out clean, with no wet batter.
Cooling Tips
After baking, remove the pan from the oven. Let it cool for about 10 minutes. Then, carefully take the bread out of the pan and place it on a wire rack. Let it cool completely before slicing. This helps keep the bread moist and delicious.
Tips & Tricks
Achieving the Best Texture
To get that soft, moist bread, follow a few simple steps. First, don’t overmix after adding the dry ingredients. Mix just until you see no dry flour. Overmixing makes the bread dense. Also, using room temperature eggs and yogurt helps create a fluffy crumb. Lastly, the Greek yogurt adds moisture, so don’t skip it!
Flavor Enhancements
You can make this bread even tastier with a few easy tweaks. Add a pinch of cloves for extra warmth. Try mixing in dried cranberries or raisins for a fruity twist. If you love chocolate, increase the chocolate chips to ¾ cup. This adds a rich sweetness that pairs well with pumpkin.
Troubleshooting Common Issues
Sometimes, things don’t go as planned. If your bread sinks, it might be due to too much liquid or not enough flour. Ensure you measure ingredients correctly. If the top browns too fast, cover it with foil halfway through baking. For bread that sticks, grease the pan well or use parchment paper. These tips help you create perfect pumpkin bread every time!
Variations
Gluten-Free Options
To make this pumpkin bread gluten-free, swap all-purpose flour for a gluten-free blend. Look for a blend that works well in baking. Make sure it has xantham gum for texture. This change keeps your bread soft and moist. Follow the rest of the recipe as is.
Vegan Alternative
You can easily change this recipe to be vegan. Replace the eggs with two flax eggs. To make a flax egg, mix one tablespoon of ground flaxseed with three tablespoons of water. Let it sit for five minutes until it thickens. Use a plant-based yogurt instead of Greek yogurt. This keeps the bread creamy and delicious.
Flavor Substitutions
Feel free to mix up the flavors in your pumpkin bread. You can add a teaspoon of cocoa powder for a chocolate twist. If you love spices, increase the cinnamon or nutmeg. You can even add a hint of orange zest for a fresh taste. For nut lovers, try pecans or almonds instead of walnuts. Each change brings a new flavor to your bread.
Storage Info
Best Storage Practices
To keep your Starbucks style pumpkin bread fresh, store it in an airtight container. You can also wrap it in plastic wrap or foil. This keeps moisture in and air out. Place it at room temperature if you plan to eat it within three days. For longer storage, put it in the fridge. This way, it stays good for about a week.
Freezing Instructions
If you want to save some for later, freezing works great. First, let the bread cool completely. Then, wrap it tightly in plastic wrap. Next, put the wrapped loaf in a freezer bag. Squeeze out the air before sealing it. This helps prevent freezer burn. Your pumpkin bread can stay fresh in the freezer for up to three months.
How to Reheat for Freshness
When you’re ready to enjoy it again, thaw the bread in the fridge overnight. Once thawed, you can reheat slices in a toaster or oven. Preheat the oven to 350°F (175°C). Place the slices on a baking sheet and heat for about 10 minutes. This warms the bread and brings back its soft texture. You can also microwave a slice for 15-20 seconds. Enjoy your warm, freshly baked taste!
FAQs
How do I make Starbucks Style Pumpkin Bread taste like the original?
To copy that Starbucks flavor, you need to focus on the spices. Use fresh ground cinnamon, nutmeg, and ginger for more punch. The key is in the pumpkin puree too; use a good quality one. Adding a bit of extra sugar can also help mimic that sweet, rich taste. Finally, consider folding in chocolate chips for a sweet surprise, just like at Starbucks.
Can I use fresh pumpkin instead of canned?
Yes, you can use fresh pumpkin! Just remember to cook and puree it first. Cut the pumpkin, roast it, and scoop out the insides. Make sure to drain any excess water. This will give you a lovely, fresh flavor that works great in your bread. However, canned pumpkin is often easier and more consistent.
What can I substitute for Greek yogurt?
If you don’t have Greek yogurt, you can use sour cream or regular yogurt. Both options will add moisture. You can also use applesauce for a low-fat option, but keep in mind it will change the flavor slightly. Just make sure whatever you choose adds some creaminess to your bread.
How long does the bread stay fresh?
Your pumpkin bread will stay fresh for about 3 to 4 days at room temperature. Just wrap it tightly in plastic wrap or foil. If you want to keep it longer, place it in the fridge for up to a week. For the best taste, eat it fresh within the first few days.
Can I make mini loaves or muffins instead?
Absolutely! You can make mini loaves or muffins with this recipe. Just adjust the baking time. For mini loaves, bake for about 30 to 40 minutes. For muffins, check them at 20 to 25 minutes. Keep an eye on them and do the toothpick test to make sure they’re done!
Now you know how to make delicious pumpkin bread. We covered ingredients, steps, and tips. You saw options for gluten-free and vegan versions too.
Taking time to choose the right ingredients makes a big difference. Follow storage tips to enjoy your bread longer. You can even troubleshoot issues that come up while baking.
With these insights, you can create a perfect loaf every time. Happy baking!