Are you ready to treat yourself to a delicious frozen delight? Neapolitan Ice Cream Cake is your answer! This fun, colorful dessert layers chocolate cake with rich ice cream flavors. It’s simple to make and perfect for parties or just a special treat. In this post, I’ll guide you through easy steps, share some handy tips, and suggest fun variations. Let’s dive into making your new favorite sweet treat!
Ingredients
Main Ingredients for Neapolitan Ice Cream Cake
– 1 box of chocolate cake mix (including required eggs, oil, and water)
– 1 tub (about 1.5 quarts) of softened strawberry ice cream
– 1 tub (about 1.5 quarts) of softened vanilla ice cream
– 1 tub (about 1.5 quarts) of softened chocolate ice cream
– 1 cup of whipped cream or whipped topping
– 1 cup of chocolate syrup for drizzling
– Fresh strawberries and chocolate shavings for garnish
When you make Neapolitan ice cream cake, you need these main ingredients. First, grab a box of chocolate cake mix. This will form the foundation of your cake. Make sure to check the box for what else you need, like eggs, oil, and water.
Next, you will need three flavors of ice cream: strawberry, vanilla, and chocolate. Softening them makes layering easy. You will also want some whipped cream or whipped topping. This will help frost the cake and give it that creamy texture.
Don’t forget the chocolate syrup! It adds a sweet drizzle on top. For a beautiful finish, use fresh strawberries and chocolate shavings as a garnish. They make the cake look vibrant and fun.
Optional Ingredients
– Additional toppings like sprinkles or nuts
– Flavor variations for the cake or ice cream
Feel free to get creative with optional ingredients! You can add sprinkles or nuts for extra crunch and color. Try different ice cream flavors or even a vanilla cake mix for a twist. The fun part of making this cake is personalizing it to your taste! If you want to dive deeper, check out the Full Recipe for more ideas.
Step-by-Step Instructions
Preparing the Chocolate Cake
First, preheat your oven to the temperature on the cake mix box. In a large bowl, mix the chocolate cake batter as the box instructs. It’s easy! Pour the batter evenly into two greased 9-inch round cake pans. Bake according to the package instructions. Use a toothpick to check if it’s done. If it comes out clean, the cake is ready! Let the cakes cool completely on a wire rack.
Freezing the Ice Cream Layers
While the cakes cool, let’s prepare the ice cream. Take your softened strawberry, vanilla, and chocolate ice cream. Line three 9-inch round cake pans with plastic wrap. This helps later when we remove the ice cream. Scoop the strawberry ice cream into one pan and smooth it out with a spatula. Repeat this for the vanilla and chocolate ice cream in separate pans. Place all three pans in the freezer. Freeze for at least 4 hours, or until they are firm.
Assembling the Cake
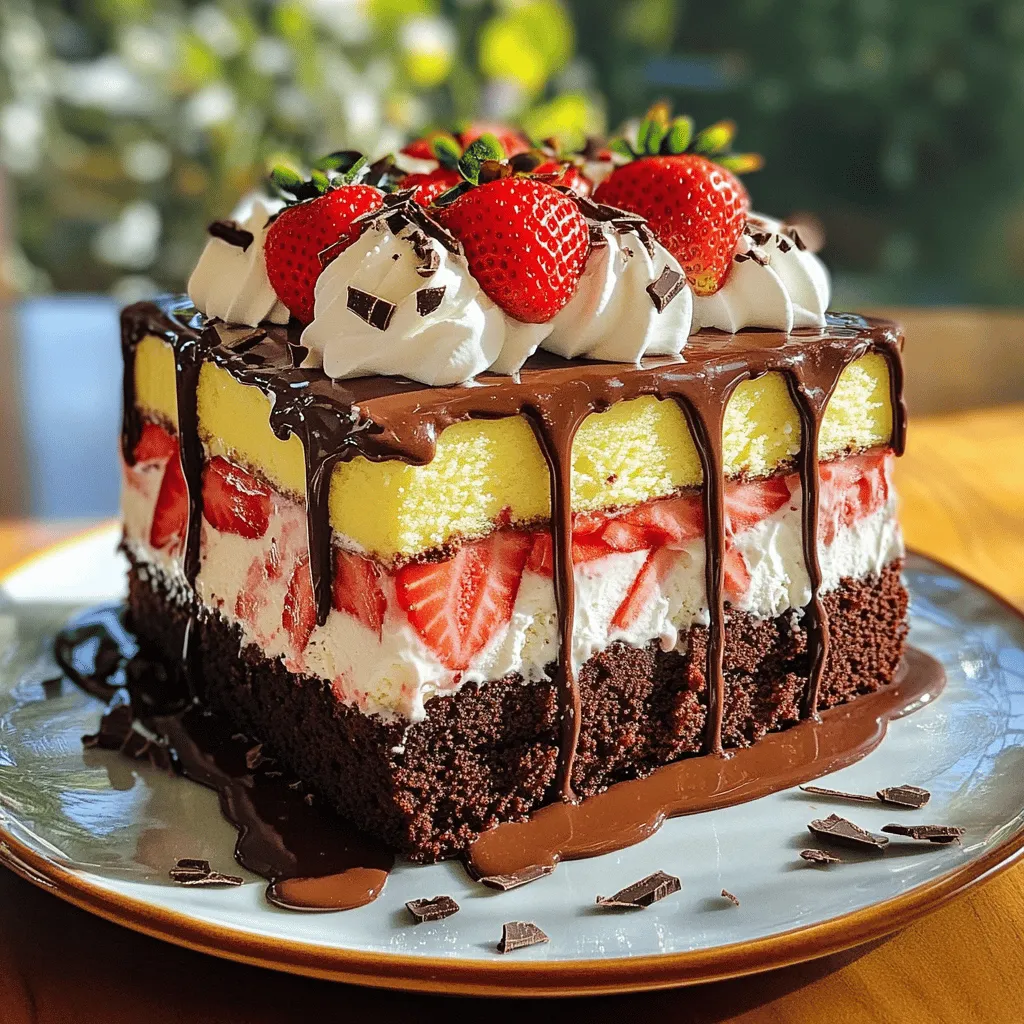
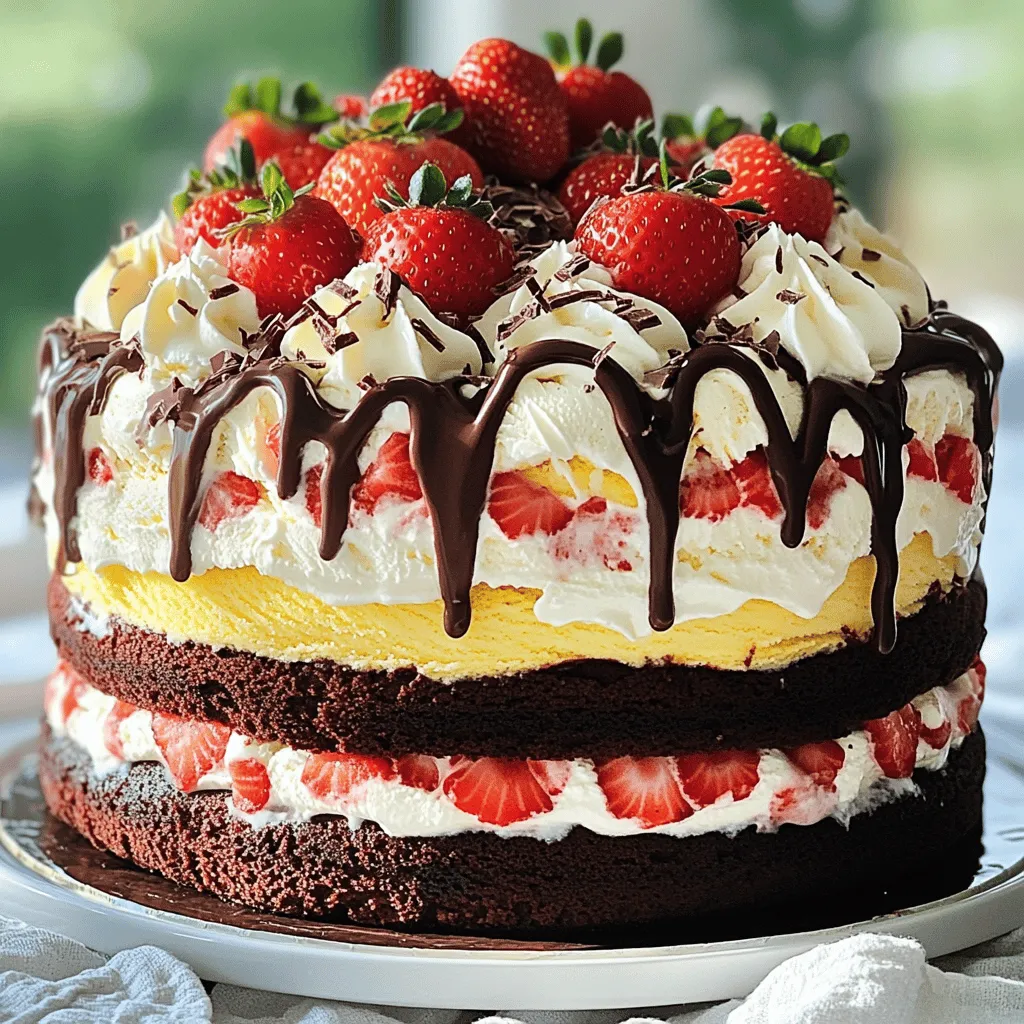
Once the cakes and ice cream layers are set, we can assemble the cake. Carefully lift the ice cream out of the pans using the plastic wrap. Place the first chocolate cake layer on a serving plate. Make sure it is centered. Now, set the strawberry ice cream layer on top of the cake. Press down gently to help it stick. Next, add the vanilla ice cream layer and gently press it down. Place the second chocolate cake layer on top, followed by the chocolate ice cream layer. Press down gently once more to keep everything secure.
Now it’s time to frost the cake! Take the whipped cream and spread it evenly over the top and sides. Make it nice and smooth! Drizzle chocolate syrup over the frosted cake. Let it cascade down the sides for a yummy look. For the finishing touch, decorate the top with fresh strawberries and sprinkle chocolate shavings on the whipped cream.
Finally, put the cake back in the freezer for at least 30 minutes. This helps it hold its shape when served. Enjoy making this delightful treat! For the complete recipe, refer to the Full Recipe section.
Tips & Tricks
Achieving the Perfect Ice Cream Layer
To ensure your ice cream layers are easy to work with, start by softening them. Take your tubs of strawberry, vanilla, and chocolate ice cream out of the freezer about 15 minutes before you want to layer. This allows them to soften just enough.
When spreading the ice cream, use a spatula. It helps to smooth the surface. Make sure to press down gently to help the ice cream stick to the cake.
For the best results, freeze each layer for at least 4 hours. This helps them hold their shape. If you want to freeze them longer, that’s okay too. Just make sure they stay covered to prevent freezer burn.
Frosting Tips
For smooth frosting, take your whipped cream and let it sit at room temperature for a few minutes. This makes it easier to spread. Use a wide spatula to apply the whipped cream evenly over the cake.
To create a beautiful chocolate syrup drizzle, use a squeeze bottle or a spoon. Start at the center and move outward. Let the syrup drip down the sides for a fancy look.
You can also add fresh strawberries and chocolate shavings on top for extra flair. These touches make your Neapolitan Ice Cream Cake not only tasty but also a feast for the eyes.
Variations
Flavor Swaps
You can switch up the ice cream flavors to mix things up. Try mint ice cream for a cool twist. Cookies and cream adds a fun texture to your cake. For the cake, consider using vanilla or even red velvet. These flavors create a nice contrast with the ice cream layers.
Dietary Modifications
If you need gluten-free options, look for gluten-free cake mixes. Many brands offer good choices that taste great. For vegan options, use plant-based ice cream. Almond milk or coconut milk ice creams work well. You can also use coconut whipped cream instead of regular whipped cream. These swaps keep the cake delicious and suitable for everyone.
For the full recipe, check out the detailed instructions to get started on your Neapolitan Ice Cream Cake.
Storage Info
Best Way to Store Neapolitan Ice Cream Cake
To keep your Neapolitan ice cream cake fresh, use an airtight container. If you don’t have one, wrap the cake tightly in plastic wrap. This helps prevent freezer burn. Store the cake in the freezer. It can last up to two weeks if stored properly. After that, the taste may start to fade.
Re-serving Tips
When it’s time to serve, you want the cake to have a great texture. Take the cake out of the freezer and let it sit at room temperature for about 10 minutes. This helps soften the ice cream just enough to slice easily.
To refresh the cake’s look, you can add a bit more whipped cream on top. You can also garnish with fresh strawberries or chocolate shavings. This makes each slice pop with color and taste. Enjoy your delicious treat!
FAQs
Can I make Neapolitan Ice Cream Cake ahead of time?
Yes, you can make this cake ahead! It freezes well. I recommend making it a day in advance. Just keep it covered in the freezer. This way, the flavors will blend nicely. Plus, it saves you time on the day of your event.
Where can I buy pre-made Neapolitan Ice Cream Cake?
You can find pre-made Neapolitan Ice Cream Cake at many grocery stores. Look in the frozen dessert section. Some bakeries also sell them, so check there too. If you want a special touch, ask for custom designs.
How many servings does the Neapolitan Ice Cream Cake yield?
This delicious cake yields about 12 servings. Each slice is a mix of cake and ice cream. You can cut smaller slices for more guests. Just remember, it’s hard to resist a second piece!
What can I use instead of whipped cream for frosting?
If you want a change, try using cream cheese frosting. It adds a nice tangy flavor. You can also use store-bought whipped topping for ease. For a dairy-free option, coconut whipped cream works great too!
How do I prevent melting when serving?
To keep the cake firm, serve it right from the freezer. Use chilled plates for each slice. If it starts to melt, move it back to the freezer for a few minutes. This way, you can enjoy each bite at the perfect temperature.
Making a Neapolitan ice cream cake is fun and simple. We reviewed the main ingredients, step-by-step instructions, and tips for perfect layers. You can even try different flavors or dietary options.
In the end, this cake is a great treat for any occasion. Follow the tips, and enjoy your tasty creation with friends and family. Happy baking!
