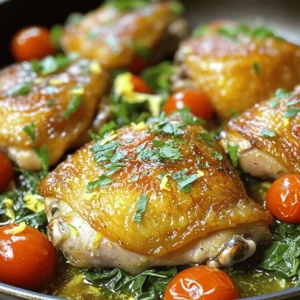
Looking for a quick and tasty dinner? One Pan Lemon Garlic Chicken is your solution! This easy weeknight recipe packs flavors that your family will love. With just a few simple ingredients and minimal cleanup, you’ll have a delicious meal on the table in no time. Join me as I walk you through the steps to create this bright and zesty dish that turns any dinner into a feast!
Ingredients
Required Ingredients
– 4 chicken thighs, skin-on and bone-in
– 2 tablespoons extra virgin olive oil
– 1 teaspoon kosher salt
– ½ teaspoon freshly cracked black pepper
– 4 cloves garlic, finely minced
– Juice and zest of 2 fresh lemons
– 1 teaspoon dried thyme (or 1 tablespoon fresh thyme, finely chopped)
– 1 cup low-sodium chicken broth
– 1 cup cherry tomatoes, halved
– 1 cup baby spinach
– Fresh parsley, chopped, for garnish
To make One Pan Lemon Garlic Chicken, start with the right ingredients. Chicken thighs give you juicy meat. They stay moist and have great flavor. Olive oil adds richness and helps with cooking. Seasonings boost the taste and make each bite pop. Fresh produce adds color and nutrition.
Optional Add-ins
– Additional vegetables
– Fresh herbs for garnish
You can make this dish even better by adding more veggies. Think green beans or zucchini. Fresh herbs like basil or dill can brighten the dish. They add a nice touch.
Tools Needed
– Oven-safe skillet
– Measuring spoons
– Cooking thermometer
You will need a few tools to cook this dish. An oven-safe skillet lets you go from stovetop to oven. Measuring spoons ensure you use the right amount of each ingredient. A cooking thermometer checks the chicken’s doneness. This way, you can be sure it is safe to eat.
For the complete recipe, check out the Full Recipe.
Step-by-Step Instructions
Preparing the Chicken
1. Preheating the oven: First, set your oven to 400°F (200°C). This helps the chicken cook evenly and get that nice, crispy skin.
2. Seasoning the chicken: Take 4 chicken thighs and season both sides with 1 teaspoon of kosher salt and ½ teaspoon of black pepper. This adds great flavor to the meat.
Searing Process
1. Heating the skillet: In a large oven-safe skillet, heat 2 tablespoons of olive oil over medium-high heat. You want the oil hot enough that it sizzles when you add the chicken.
2. Searing chicken thighs: Place the seasoned chicken thighs skin side down into the hot skillet. Sear for about 5-7 minutes until the skin is golden brown. Then flip the chicken and cook for another 5 minutes. Once done, remove the chicken from the skillet and set it aside.
Making the Sauce
1. Adding garlic: In the same skillet, add 4 cloves of minced garlic. Sauté for about 30 seconds. Stir until the garlic is fragrant and golden, but be careful not to burn it.
2. Incorporating broth and lemon: Pour in 1 cup of chicken broth, along with the juice and zest of 2 lemons. Use a wooden spoon to mix everything well. This will create a tasty sauce and help lift the brown bits from the bottom.
Final Cooking Steps
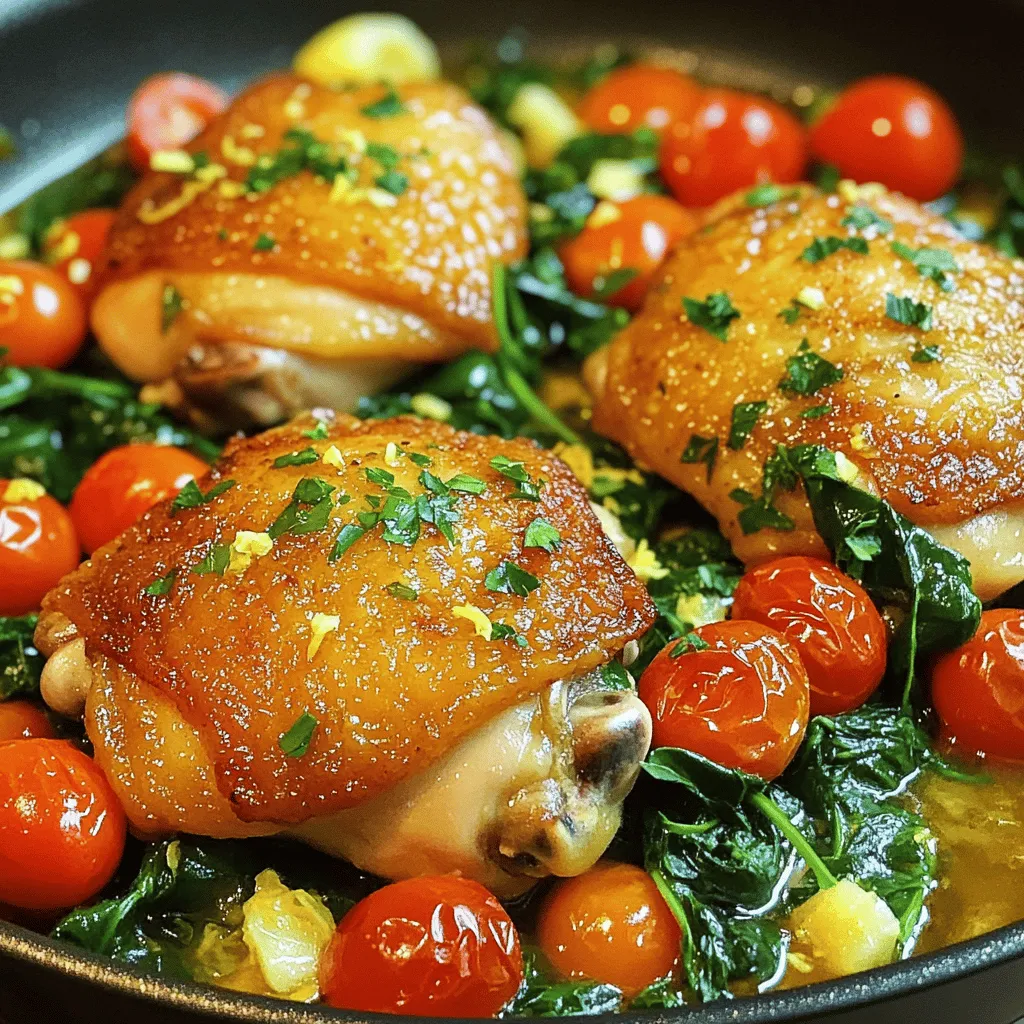
1. Nestling chicken back in pan: Add the halved cherry tomatoes and 1 cup of baby spinach to the skillet. Stir gently. Then, place the seared chicken thighs back in, skin side up. This allows the skin to stay crispy.
2. Roasting in oven until done: Move the skillet to your preheated oven. Roast for 25-30 minutes. The chicken should reach an internal temperature of at least 165°F (74°C). When done, take the skillet out and let it rest for 5 minutes before serving.
Tips & Tricks
Best Practices for Cooking Chicken
To get juicy chicken, start with the right temperature. Preheat your oven to 400°F (200°C). This step ensures even cooking. When you season the chicken, use kosher salt and cracked black pepper. This combination enhances the flavor.
When cooking, check for doneness. Use a meat thermometer to ensure the chicken reaches at least 165°F (74°C). If you don’t have a thermometer, look for the juices. They should run clear, not pink.
Enhancing Flavor
To boost flavor, use fresh ingredients. Fresh garlic and lemons add brightness. You can also include dried thyme or fresh herbs. Thyme pairs well with chicken. For added depth, consider using a splash of white wine in the sauce.
Mixing in cherry tomatoes and spinach provides color and nutrition. These ingredients also soak up the sauce’s flavor. Always taste as you go to adjust seasoning.
Presentation Ideas
How you serve your dish matters. Serve the chicken right from the skillet for a rustic feel. If you prefer, transfer it to a large platter. Arrange the cherry tomatoes and spinach around the chicken for a vibrant look.
For garnishing, sprinkle fresh parsley on top. This adds color and freshness. You can also drizzle leftover sauce over the chicken. It enhances the dish’s appeal and flavor.
Variations
Ingredient Swaps
You can change the chicken for different cuts. Chicken breasts or drumsticks work well. Both will cook nicely with the lemon garlic flavor. Also, feel free to swap vegetables. Instead of cherry tomatoes and spinach, try zucchini or bell peppers. These veggies add color and taste.
Flavor Alternatives
Want to change the taste? Use different herbs. Rosemary or oregano can replace thyme. Each brings its own unique flavor. You can also add spices to make it spicy. A pinch of red pepper flakes or cayenne pepper adds heat without overpowering the dish.
Dietary Substitutes
If you need gluten-free options, use gluten-free broth. This keeps the dish safe for those with gluten allergies. For dairy-free meals, skip any butter. You can still use olive oil for richness. These swaps keep the recipe just as tasty while meeting dietary needs.
For the full recipe, check out One Pan Lemon Garlic Chicken.
Storage Info
Storing Leftovers
Store your One Pan Lemon Garlic Chicken in the fridge. Use an airtight container. This keeps the chicken fresh and tasty. Aim to eat leftovers within three days for the best flavor.
Reheating Instructions
You can reheat the chicken in two ways: microwave or oven. For the microwave, place the chicken on a plate. Cover it with a damp paper towel to keep moisture. Heat in 30-second bursts until warm.
If using the oven, preheat it to 350°F (175°C). Place the chicken in a baking dish, cover with foil, and heat for about 20 minutes. This method helps retain the chicken’s juiciness.
Freezing Guidelines
To freeze, let the chicken cool completely. Place it in a freezer-safe bag. Remove as much air as possible to prevent freezer burn. You can freeze it for up to three months.
To thaw, move the chicken to the fridge for a night. If you’re in a hurry, use cold water in a sealed bag. Change the water every 30 minutes until it’s thawed. Enjoy your delicious meal later!
FAQs
What can I serve with One Pan Lemon Garlic Chicken?
You can serve One Pan Lemon Garlic Chicken with many tasty sides. Here are some ideas:
– Rice: Fluffy white or brown rice pairs well. It soaks up the sauce nicely.
– Potatoes: Roasted or mashed potatoes are great for a hearty meal.
– Vegetables: Steamed broccoli or green beans add color and nutrition.
– Salads: A fresh green salad with a light dressing complements the dish well.
– Grains: Quinoa or couscous can add a nice texture and flavor.
When you choose sides, think about balance. Light sides work great with rich chicken.
Can I use boneless chicken instead?
Yes, you can use boneless chicken! Just keep these tips in mind:
– Cooking time adjustments: Boneless chicken cooks faster. Check it after 20 minutes in the oven.
– Flavor differences: Bone-in chicken adds more flavor. Boneless may taste milder, but it will still be delicious.
Feel free to experiment with boneless chicken thighs or breasts.
How do I know when the chicken is fully cooked?
Knowing when chicken is done is key for safety. Here’s how to tell:
– Importance of internal temperature: Use a meat thermometer. The chicken should reach at least 165°F (74°C).
– Signs of doneness to look for: The juices should run clear, and the meat should not be pink.
Always check the thickest part of the chicken for the best results. Enjoy your meal!
In this post, we explored how to make delicious One Pan Lemon Garlic Chicken. We discussed key ingredients, the searing process, and how to create a flavorful sauce. You learned tips for perfect cooking and tasty variations to try.
Remember, cooking should be fun and simple. Use fresh ingredients, check for doneness, and feel free to swap items based on your taste. Enjoy your meal!