![- 1 pound large shrimp, peeled and deveined - 2 tablespoons blackening seasoning - 2 tablespoons olive oil - 1 cup brown rice or quinoa, cooked - 1 cup corn, fresh or frozen - 1 red bell pepper, diced - 1 ripe avocado, sliced - 1 cup cherry tomatoes, halved - Juice of 1 lime - Salt and pepper, to taste - Fresh cilantro, chopped To make your Blackened Shrimp Bowls shine, focus on fresh ingredients. Start with shrimp that are large and firm. Their size holds up well during cooking. The blackening seasoning is key. You can buy it or make your own blend with paprika, garlic powder, and cayenne. For the base, I love using brown rice or quinoa. Both add great texture and nutrients. If you want a pop of color, diced red bell pepper brings sweetness. Corn adds crunch and sweetness too, whether fresh or frozen. Finally, toppings make your bowl special. Sliced avocado gives creaminess, while cherry tomatoes add freshness. A squeeze of lime juice brightens the dish. Don’t forget salt and pepper to enhance the flavors. Fresh cilantro is a must for a final touch. This recipe is about balance. You have protein, grains, veggies, and bright flavors. For the full recipe, check out the details above. - In a medium bowl, combine 1 pound of peeled and deveined shrimp with 2 tablespoons of blackening seasoning. - Toss the shrimp until they are evenly coated with the spice mix. Each shrimp should be covered well. - Heat a large skillet over medium-high heat and add 2 tablespoons of olive oil. - Once the oil shimmers, add the shrimp in a single layer. Cook the shrimp for 2-3 minutes on each side. They will turn opaque and get a nice char. Remove them from the skillet once cooked. - In the same skillet, add 1 cup of diced red bell pepper and 1 cup of corn. - Stir-fry for 3-4 minutes until the bell pepper is tender but still has some crunch. Season with salt and pepper to taste. Remove from heat. - Start with a scoop of warm cooked brown rice or quinoa in four bowls. - Layer the sautéed corn and bell pepper mixture on top. Add the blackened shrimp next, followed by slices of avocado and halved cherry tomatoes. - Finish by squeezing fresh lime juice over each bowl and garnish with chopped cilantro for a fresh touch. For the complete recipe, check out the [Full Recipe]. To achieve the perfect char on shrimp, use high heat. A hot skillet helps sear the shrimp quickly. This gives a nice crust while keeping the inside tender. Make sure the shrimp are dry before seasoning. Pat them with a paper towel. This helps the spices stick well. Choosing the right blackening seasoning is key. You can buy it or make your own. A mix of paprika, cayenne, garlic powder, and onion powder works great. Adjust the spice level to your taste. A little heat can make your dish exciting. You can grill or use a skillet for cooking shrimp. Grilling adds a smoky flavor. If you choose to grill, preheat the grill well. Place the shrimp on skewers for easy handling. If you prefer the skillet, follow the recipe closely. The skillet gives a nice char and is quick. You can also bake shrimp in the oven. Preheat your oven to 400°F. Place the shrimp on a sheet pan and bake for 8-10 minutes, checking for doneness. Pair your blackened shrimp bowls with sides like sautéed greens or a fresh salad. A refreshing drink, like iced tea or lemonade, complements the meal well. For meal prep, these bowls store well. You can make extra shrimp or veggies for lunch. Leftovers taste great the next day. Just reheat and enjoy your tasty blackened shrimp bowls again. For the full recipe, check the link! {{image_4}} You can easily swap shrimp for other proteins. Chicken is a great choice. Just cut it into bite-sized pieces. Cook it for about 5-7 minutes, until it's no longer pink. Tofu is another option. Use firm tofu and cube it. Sauté it for 3-4 minutes until golden. Fish like salmon or tilapia works well too. Cook fish for about 4-5 minutes per side, depending on thickness. Adjust cooking times for each protein. This way, you ensure everything is cooked perfectly. Want to add some creaminess? Try a smooth avocado dressing or a yogurt sauce. Both pair well with the rich flavors of the blackened shrimp. For a spicy kick, mix in sriracha or hot sauce. A citrus-based dressing is also great. Combine olive oil, lime juice, and a hint of honey for a fresh twist. These sauces can elevate your dish and add new layers of flavor. Feel free to get creative with your toppings! Extra veggies can boost nutrition and taste. Add shredded carrots, diced cucumbers, or even roasted sweet potatoes. Nuts like sliced almonds or chopped walnuts add crunch. If you have dietary restrictions, you can customize easily. Use gluten-free grains or plant-based proteins. This flexibility allows you to make a bowl that fits your needs perfectly. For the full recipe, check out the Blackened Shrimp Bowls section. To store your Blackened Shrimp Bowls, let them cool first. Place leftovers in an airtight container. This helps keep them fresh and tasty. You can store them in the fridge for up to three days. After that, the shrimp may lose flavor and texture. If you want to save the shrimp bowls for later, freezing is a great option. Make sure to pack them in a freezer-safe container. They can last up to three months in the freezer. When you’re ready to eat, thaw them overnight in the fridge. To reheat, use the microwave or a skillet until everything is hot. This way, you enjoy a quick, delicious meal anytime. For the full recipe, check out the details to make these tasty bowls. It takes about 30 minutes to make Blackened Shrimp Bowls. You’ll spend 10 minutes for prep and 20 minutes for cooking. This quick time makes it perfect for busy nights. Yes, you can prepare the components ahead of time. Cook the shrimp and veggies, then store them separately. When you’re ready to eat, just reheat and assemble. You can use Cajun spice or a mix of paprika, garlic powder, and cayenne. These options will give you similar flavors. Experiment with spices to find what you love best. Absolutely! You can swap shrimp for firm tofu or chickpeas. Just season and cook them the same way. This way, you’ll still get a tasty and satisfying meal. To lower the spice, use less blackening seasoning. For more heat, add extra cayenne or hot sauce. Taste as you go to find your perfect balance. You now have a tasty way to enjoy blackened shrimp bowls. We explored the ingredients, cooking steps, and possible variations. You can customize this dish based on your tastes. Remember to store leftovers properly for later meals. Enjoy experimenting with flavors and textures. These bowls are not just delicious; they are fun to prepare too. Try them out and make them your own!](https://meltedrecipes.com/wp-content/uploads/2025/05/52806d95-a0ae-432f-b8bb-b3553b91349f.webp)
Looking for a quick, flavorful dinner idea? Try Blackened Shrimp Bowls! This meal combines tender shrimp, vibrant veggies, and a zesty kick that packs a punch. It’s perfect for busy nights when you want something healthy and satisfying. In just a few simple steps, you’ll create a bowl that’s not only delicious but also customizable to your taste. Let’s dive in and get cooking!
Ingredients
Shrimp and Seasoning
– 1 pound large shrimp, peeled and deveined
– 2 tablespoons blackening seasoning
– 2 tablespoons olive oil
Base and Vegetables
– 1 cup brown rice or quinoa, cooked
– 1 cup corn, fresh or frozen
– 1 red bell pepper, diced
Toppings and Garnishes
– 1 ripe avocado, sliced
– 1 cup cherry tomatoes, halved
– Juice of 1 lime
– Salt and pepper, to taste
– Fresh cilantro, chopped
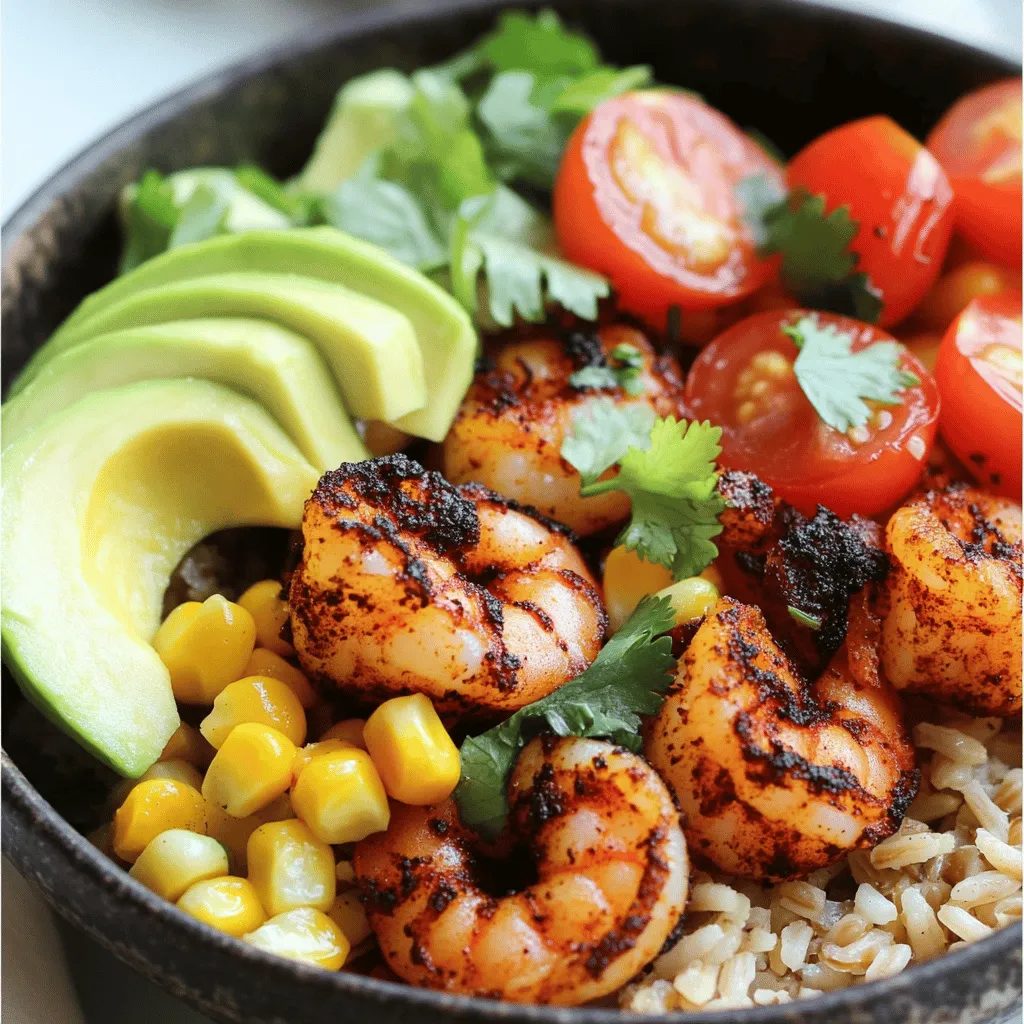
To make your Blackened Shrimp Bowls shine, focus on fresh ingredients. Start with shrimp that are large and firm. Their size holds up well during cooking. The blackening seasoning is key. You can buy it or make your own blend with paprika, garlic powder, and cayenne.
For the base, I love using brown rice or quinoa. Both add great texture and nutrients. If you want a pop of color, diced red bell pepper brings sweetness. Corn adds crunch and sweetness too, whether fresh or frozen.
Finally, toppings make your bowl special. Sliced avocado gives creaminess, while cherry tomatoes add freshness. A squeeze of lime juice brightens the dish. Don’t forget salt and pepper to enhance the flavors. Fresh cilantro is a must for a final touch.
This recipe is about balance. You have protein, grains, veggies, and bright flavors. For the full recipe, check out the details above.
Step-by-Step Instructions
Preparing the Shrimp
– In a medium bowl, combine 1 pound of peeled and deveined shrimp with 2 tablespoons of blackening seasoning.
– Toss the shrimp until they are evenly coated with the spice mix. Each shrimp should be covered well.
Cooking the Shrimp
– Heat a large skillet over medium-high heat and add 2 tablespoons of olive oil.
– Once the oil shimmers, add the shrimp in a single layer. Cook the shrimp for 2-3 minutes on each side. They will turn opaque and get a nice char. Remove them from the skillet once cooked.
Sautéing Vegetables
– In the same skillet, add 1 cup of diced red bell pepper and 1 cup of corn.
– Stir-fry for 3-4 minutes until the bell pepper is tender but still has some crunch. Season with salt and pepper to taste. Remove from heat.
Assembling the Bowls
– Start with a scoop of warm cooked brown rice or quinoa in four bowls.
– Layer the sautéed corn and bell pepper mixture on top. Add the blackened shrimp next, followed by slices of avocado and halved cherry tomatoes.
– Finish by squeezing fresh lime juice over each bowl and garnish with chopped cilantro for a fresh touch.
For the complete recipe, check out the [Full Recipe].
Tips & Tricks
Best Practices for Blackening
To achieve the perfect char on shrimp, use high heat. A hot skillet helps sear the shrimp quickly. This gives a nice crust while keeping the inside tender. Make sure the shrimp are dry before seasoning. Pat them with a paper towel. This helps the spices stick well.
Choosing the right blackening seasoning is key. You can buy it or make your own. A mix of paprika, cayenne, garlic powder, and onion powder works great. Adjust the spice level to your taste. A little heat can make your dish exciting.
Cooking Method Alternatives
You can grill or use a skillet for cooking shrimp. Grilling adds a smoky flavor. If you choose to grill, preheat the grill well. Place the shrimp on skewers for easy handling.
If you prefer the skillet, follow the recipe closely. The skillet gives a nice char and is quick. You can also bake shrimp in the oven. Preheat your oven to 400°F. Place the shrimp on a sheet pan and bake for 8-10 minutes, checking for doneness.
Serving Suggestions
Pair your blackened shrimp bowls with sides like sautéed greens or a fresh salad. A refreshing drink, like iced tea or lemonade, complements the meal well.
For meal prep, these bowls store well. You can make extra shrimp or veggies for lunch. Leftovers taste great the next day. Just reheat and enjoy your tasty blackened shrimp bowls again. For the full recipe, check the link!
Variations
Protein Alternatives
You can easily swap shrimp for other proteins. Chicken is a great choice. Just cut it into bite-sized pieces. Cook it for about 5-7 minutes, until it’s no longer pink. Tofu is another option. Use firm tofu and cube it. Sauté it for 3-4 minutes until golden. Fish like salmon or tilapia works well too. Cook fish for about 4-5 minutes per side, depending on thickness. Adjust cooking times for each protein. This way, you ensure everything is cooked perfectly.
Sauce and Dressing Options
Want to add some creaminess? Try a smooth avocado dressing or a yogurt sauce. Both pair well with the rich flavors of the blackened shrimp. For a spicy kick, mix in sriracha or hot sauce. A citrus-based dressing is also great. Combine olive oil, lime juice, and a hint of honey for a fresh twist. These sauces can elevate your dish and add new layers of flavor.
Additional Toppings
Feel free to get creative with your toppings! Extra veggies can boost nutrition and taste. Add shredded carrots, diced cucumbers, or even roasted sweet potatoes. Nuts like sliced almonds or chopped walnuts add crunch. If you have dietary restrictions, you can customize easily. Use gluten-free grains or plant-based proteins. This flexibility allows you to make a bowl that fits your needs perfectly. For the full recipe, check out the Blackened Shrimp Bowls section.
Storage Info
Refrigeration Guidelines
To store your Blackened Shrimp Bowls, let them cool first. Place leftovers in an airtight container. This helps keep them fresh and tasty. You can store them in the fridge for up to three days. After that, the shrimp may lose flavor and texture.
Freezing Instructions
If you want to save the shrimp bowls for later, freezing is a great option. Make sure to pack them in a freezer-safe container. They can last up to three months in the freezer. When you’re ready to eat, thaw them overnight in the fridge. To reheat, use the microwave or a skillet until everything is hot. This way, you enjoy a quick, delicious meal anytime. For the full recipe, check out the details to make these tasty bowls.
FAQs
How long does it take to make Blackened Shrimp Bowls?
It takes about 30 minutes to make Blackened Shrimp Bowls. You’ll spend 10 minutes for prep and 20 minutes for cooking. This quick time makes it perfect for busy nights.
Can I make this recipe ahead of time?
Yes, you can prepare the components ahead of time. Cook the shrimp and veggies, then store them separately. When you’re ready to eat, just reheat and assemble.
What can I substitute for blackening seasoning?
You can use Cajun spice or a mix of paprika, garlic powder, and cayenne. These options will give you similar flavors. Experiment with spices to find what you love best.
Is it possible to make a vegetarian version?
Absolutely! You can swap shrimp for firm tofu or chickpeas. Just season and cook them the same way. This way, you’ll still get a tasty and satisfying meal.
How do I adjust the spice level in this recipe?
To lower the spice, use less blackening seasoning. For more heat, add extra cayenne or hot sauce. Taste as you go to find your perfect balance.
You now have a tasty way to enjoy blackened shrimp bowls. We explored the ingredients, cooking steps, and possible variations. You can customize this dish based on your tastes. Remember to store leftovers properly for later meals. Enjoy experimenting with flavors and textures. These bowls are not just delicious; they are fun to prepare too. Try them out and make them your own!
![- 1 pound large shrimp, peeled and deveined - 2 tablespoons blackening seasoning - 2 tablespoons olive oil - 1 cup brown rice or quinoa, cooked - 1 cup corn, fresh or frozen - 1 red bell pepper, diced - 1 ripe avocado, sliced - 1 cup cherry tomatoes, halved - Juice of 1 lime - Salt and pepper, to taste - Fresh cilantro, chopped To make your Blackened Shrimp Bowls shine, focus on fresh ingredients. Start with shrimp that are large and firm. Their size holds up well during cooking. The blackening seasoning is key. You can buy it or make your own blend with paprika, garlic powder, and cayenne. For the base, I love using brown rice or quinoa. Both add great texture and nutrients. If you want a pop of color, diced red bell pepper brings sweetness. Corn adds crunch and sweetness too, whether fresh or frozen. Finally, toppings make your bowl special. Sliced avocado gives creaminess, while cherry tomatoes add freshness. A squeeze of lime juice brightens the dish. Don’t forget salt and pepper to enhance the flavors. Fresh cilantro is a must for a final touch. This recipe is about balance. You have protein, grains, veggies, and bright flavors. For the full recipe, check out the details above. - In a medium bowl, combine 1 pound of peeled and deveined shrimp with 2 tablespoons of blackening seasoning. - Toss the shrimp until they are evenly coated with the spice mix. Each shrimp should be covered well. - Heat a large skillet over medium-high heat and add 2 tablespoons of olive oil. - Once the oil shimmers, add the shrimp in a single layer. Cook the shrimp for 2-3 minutes on each side. They will turn opaque and get a nice char. Remove them from the skillet once cooked. - In the same skillet, add 1 cup of diced red bell pepper and 1 cup of corn. - Stir-fry for 3-4 minutes until the bell pepper is tender but still has some crunch. Season with salt and pepper to taste. Remove from heat. - Start with a scoop of warm cooked brown rice or quinoa in four bowls. - Layer the sautéed corn and bell pepper mixture on top. Add the blackened shrimp next, followed by slices of avocado and halved cherry tomatoes. - Finish by squeezing fresh lime juice over each bowl and garnish with chopped cilantro for a fresh touch. For the complete recipe, check out the [Full Recipe]. To achieve the perfect char on shrimp, use high heat. A hot skillet helps sear the shrimp quickly. This gives a nice crust while keeping the inside tender. Make sure the shrimp are dry before seasoning. Pat them with a paper towel. This helps the spices stick well. Choosing the right blackening seasoning is key. You can buy it or make your own. A mix of paprika, cayenne, garlic powder, and onion powder works great. Adjust the spice level to your taste. A little heat can make your dish exciting. You can grill or use a skillet for cooking shrimp. Grilling adds a smoky flavor. If you choose to grill, preheat the grill well. Place the shrimp on skewers for easy handling. If you prefer the skillet, follow the recipe closely. The skillet gives a nice char and is quick. You can also bake shrimp in the oven. Preheat your oven to 400°F. Place the shrimp on a sheet pan and bake for 8-10 minutes, checking for doneness. Pair your blackened shrimp bowls with sides like sautéed greens or a fresh salad. A refreshing drink, like iced tea or lemonade, complements the meal well. For meal prep, these bowls store well. You can make extra shrimp or veggies for lunch. Leftovers taste great the next day. Just reheat and enjoy your tasty blackened shrimp bowls again. For the full recipe, check the link! {{image_4}} You can easily swap shrimp for other proteins. Chicken is a great choice. Just cut it into bite-sized pieces. Cook it for about 5-7 minutes, until it's no longer pink. Tofu is another option. Use firm tofu and cube it. Sauté it for 3-4 minutes until golden. Fish like salmon or tilapia works well too. Cook fish for about 4-5 minutes per side, depending on thickness. Adjust cooking times for each protein. This way, you ensure everything is cooked perfectly. Want to add some creaminess? Try a smooth avocado dressing or a yogurt sauce. Both pair well with the rich flavors of the blackened shrimp. For a spicy kick, mix in sriracha or hot sauce. A citrus-based dressing is also great. Combine olive oil, lime juice, and a hint of honey for a fresh twist. These sauces can elevate your dish and add new layers of flavor. Feel free to get creative with your toppings! Extra veggies can boost nutrition and taste. Add shredded carrots, diced cucumbers, or even roasted sweet potatoes. Nuts like sliced almonds or chopped walnuts add crunch. If you have dietary restrictions, you can customize easily. Use gluten-free grains or plant-based proteins. This flexibility allows you to make a bowl that fits your needs perfectly. For the full recipe, check out the Blackened Shrimp Bowls section. To store your Blackened Shrimp Bowls, let them cool first. Place leftovers in an airtight container. This helps keep them fresh and tasty. You can store them in the fridge for up to three days. After that, the shrimp may lose flavor and texture. If you want to save the shrimp bowls for later, freezing is a great option. Make sure to pack them in a freezer-safe container. They can last up to three months in the freezer. When you’re ready to eat, thaw them overnight in the fridge. To reheat, use the microwave or a skillet until everything is hot. This way, you enjoy a quick, delicious meal anytime. For the full recipe, check out the details to make these tasty bowls. It takes about 30 minutes to make Blackened Shrimp Bowls. You’ll spend 10 minutes for prep and 20 minutes for cooking. This quick time makes it perfect for busy nights. Yes, you can prepare the components ahead of time. Cook the shrimp and veggies, then store them separately. When you’re ready to eat, just reheat and assemble. You can use Cajun spice or a mix of paprika, garlic powder, and cayenne. These options will give you similar flavors. Experiment with spices to find what you love best. Absolutely! You can swap shrimp for firm tofu or chickpeas. Just season and cook them the same way. This way, you’ll still get a tasty and satisfying meal. To lower the spice, use less blackening seasoning. For more heat, add extra cayenne or hot sauce. Taste as you go to find your perfect balance. You now have a tasty way to enjoy blackened shrimp bowls. We explored the ingredients, cooking steps, and possible variations. You can customize this dish based on your tastes. Remember to store leftovers properly for later meals. Enjoy experimenting with flavors and textures. These bowls are not just delicious; they are fun to prepare too. Try them out and make them your own!](https://meltedrecipes.com/wp-content/uploads/2025/05/52806d95-a0ae-432f-b8bb-b3553b91349f-300x300.webp)