Do you love sweet, creamy treats? Then you’ll adore these Decadent Banana Pudding Rice Krispie Treats! Combining the crunch of Rice Krispies with the smoothness of banana pudding makes a perfect snack. In this post, I’ll guide you step-by-step through the easy process. Plus, you’ll learn tips and tricks to make your treats stand out. Let’s dive into this delicious recipe that’s sure to delight everyone!
Ingredients
List of Ingredients
– Rice Krispie cereal: 4 cups
– Mini marshmallows: 1 cup
– Unsalted butter: 1/2 cup
– Vanilla extract: 1/2 teaspoon
– Instant banana pudding mix: 1 box (3.4 oz)
– Milk: 1 cup
– Fresh sliced bananas: 1 cup
– Whipped cream (optional for garnish): 1/2 cup
– Crushed vanilla wafers (for topping): 1/4 cup
To make these treats, you will need simple ingredients. Rice Krispie cereal gives the treats their crisp and crunchy base. Mini marshmallows add sweetness and a soft texture. Unsalted butter helps bind everything together. A touch of vanilla extract gives a warm flavor.
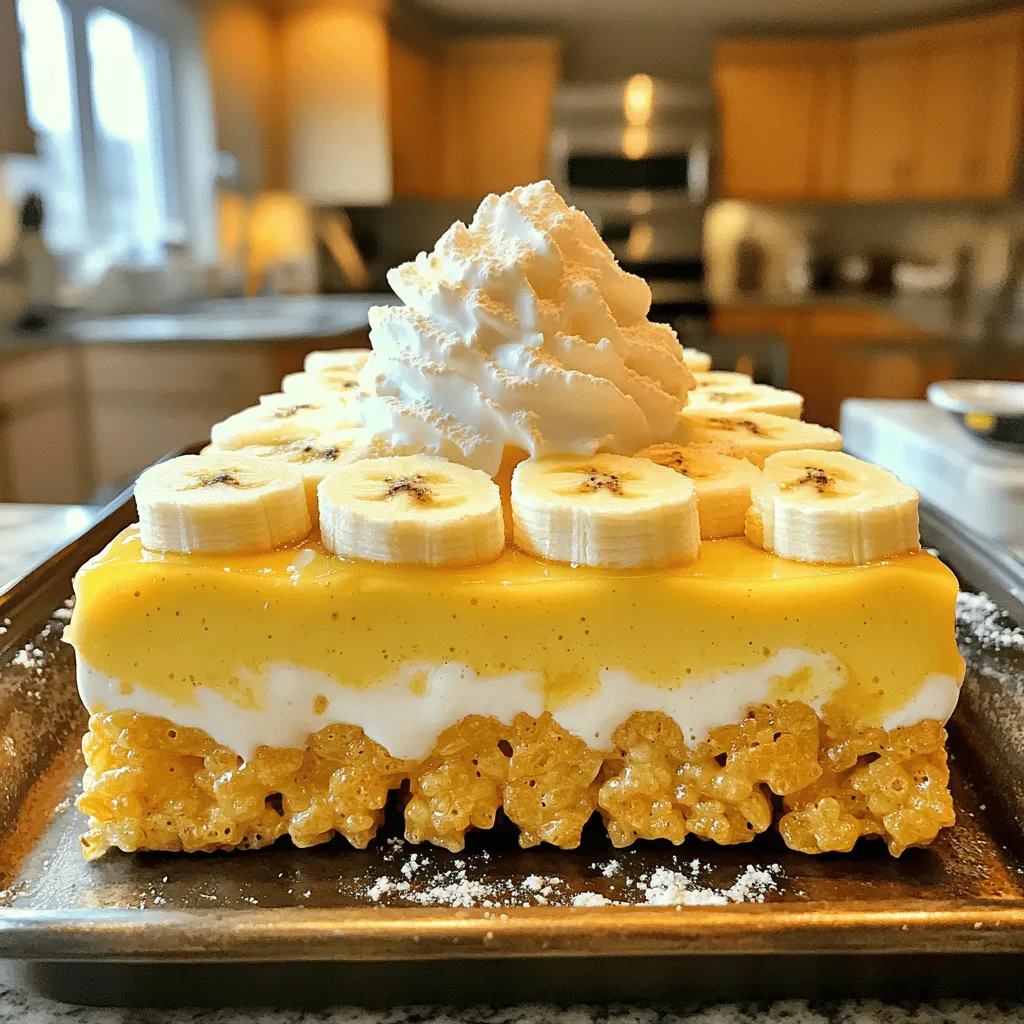
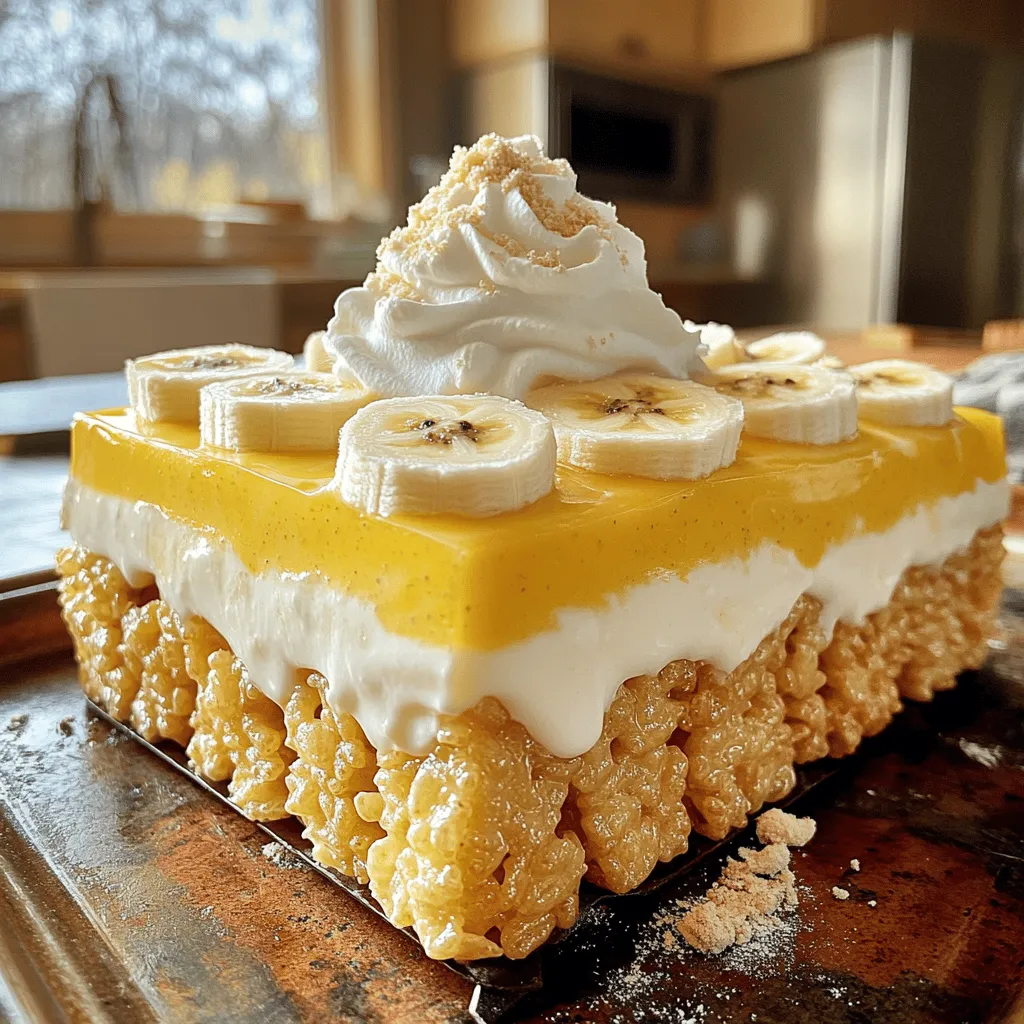
The star of this recipe is the instant banana pudding mix. It brings that rich banana flavor we all love. You’ll also use milk to mix with the pudding. Fresh sliced bananas add a burst of fruitiness. For a fun presentation, you can add whipped cream and crushed vanilla wafers on top.
You can find the full recipe for these delicious Banana Pudding Rice Krispie Treats. Let’s gather these ingredients and get ready to create a tasty treat!
Step-by-Step Instructions
Preparation Steps Overview
1. Start by greasing a 9×13 inch baking dish. Use a small amount of butter. This helps prevent sticking.
2. In a large saucepan, melt the butter over low heat. Once melted, add the mini marshmallows. Stir until smooth.
3. Remove from heat and mix in the vanilla extract. This adds a lovely flavor.
Combining Base Ingredients
1. Gradually add the Rice Krispie cereal to the marshmallow mix. Stir gently until all cereal is coated.
2. In a separate bowl, mix the instant banana pudding with the milk. Whisk for two minutes until it thickens.
3. Fold in the fresh sliced bananas. Be careful not to mash them. You want nice chunks of banana.
Layering the Treats
1. Let the Rice Krispie mix cool a bit. Then, press half into the greased baking dish. This forms the first layer.
2. Spoon the banana pudding mix over the Rice Krispie layer. Spread it out evenly.
3. Crumble the rest of the Rice Krispie mixture on top. Press it down gently to hold the layers together.
You can find the full recipe with detailed steps and tips to make your treats shine!
Tips & Tricks
Achieving the Best Texture
To get the best texture for Banana Pudding Rice Krispie Treats, let the mixture cool slightly before you press it into the pan. This step helps keep the treats fluffy and light. If the mixture is too hot, it can flatten out and lose that perfect bite.
Make sure to evenly distribute the bananas when you mix them in. This way, each bite gets a taste of banana. You want those sweet bits in every square.
Presentation Tips
When serving these treats, use a nice platter. It makes them look more inviting. You can add a drizzle of chocolate syrup on top for a fun twist. Slices of fresh banana on each piece add color and freshness, too.
For a special touch, try adding dollops of whipped cream on top. It gives a creamy finish that everyone loves.
Common Mistakes to Avoid
A common mistake is overheating the butter and marshmallows. If you cook them too much, the treats may become too hard. Keep the heat low and stir until just melted.
Another mistake is not letting the mixture set properly. If you slice them too soon, they may fall apart. Chill the treats in the fridge for at least an hour before cutting. This makes them easier to handle and helps keep their shape.
For the full recipe, check out the section above!
Variations
Flavor Extensions
Chocolate Banana Pudding Rice Krispie Treats
To add a twist, mix in cocoa powder. Use 1/4 cup of cocoa with the Rice Krispie cereal. This gives your treats a rich chocolate taste. Top with chocolate shavings for a fun finish.
Nutty Banana Pudding Variants
If you love nuts, add chopped walnuts or pecans. Mix in 1/2 cup of nuts into the Rice Krispie layer. This adds a nice crunch and a nutty flavor. You can also sprinkle some on top for extra flair.
Dietary Adjustments
Gluten-free options
To make these treats gluten-free, use gluten-free Rice Krispie cereal. Check labels to ensure all ingredients are safe. This way, everyone can enjoy the fun without worries.
Dairy-free substitutions
If you need dairy-free treats, swap the butter with coconut oil. Use a non-dairy milk like almond or oat milk in the pudding mix. This keeps the taste delicious while meeting dietary needs.
Serving Style Modifications
Individual servings in cups
For a fun twist, serve the treats in small cups. Layer the Rice Krispie mixture and pudding in clear cups. Kids will love their own little dessert cups, and it looks great too!
Layering in dessert jars
You can also use mason jars for a trendy look. Layer the Rice Krispie mix, pudding, and bananas in jars. This makes for a beautiful presentation and is perfect for parties.
For the full recipe, check out the earlier section!
Storage Info
Best Storage Practices
Store your Banana Pudding Rice Krispie Treats in an airtight container. This keeps them fresh and moist. I recommend using a glass or plastic container with a tight lid. Place a piece of parchment paper between layers to avoid sticking.
Keep them at room temperature for the best taste. Do not expose them to heat or direct sunlight. A cool, dry spot works best for storage.
Shelf Life
These treats last about 3 to 5 days. After this time, they may start to lose their texture and flavor. Look for changes in smell or a hard texture. If they feel tough or dry, it’s time to toss them.
Freezing Tips
Yes, you can freeze these treats! Wrap them tightly in plastic wrap, then place them in a freezer bag. This way, they stay fresh for up to 2 months.
For thawing, take them out and let them sit at room temperature for about 30 minutes. This helps keep their texture nice and soft. Enjoy your treats anytime you crave a sweet bite! For the full recipe, check out the detailed instructions above.
FAQs
Can I make these Banana Pudding Rice Krispie Treats ahead of time?
Yes, you can make these treats ahead of time. To do this, follow these tips for best results:
– Make the treats and allow them to cool completely.
– Once cooled, slice them into squares.
– Store them in an airtight container.
– Keep them in the fridge for up to three days.
Making them ahead of time helps the flavors meld nicely. Just remember to let them sit at room temperature for a few minutes before serving for the best texture.
What can I substitute for Rice Krispie cereal?
If you do not have Rice Krispie cereal, there are great alternatives. Here are a few options:
– Cornflakes: These work well and add a nice crunch.
– Puffed rice: A lighter option that maintains the texture.
– Cheerios: These offer a different flavor but still hold up well.
– Granola: A sweet and crunchy twist that adds a unique flavor.
Feel free to experiment! Each cereal will give your treats a different taste and texture.
How do I store leftovers properly?
To keep your Banana Pudding Rice Krispie Treats fresh, follow these storage tips:
– Place them in an airtight container to prevent them from drying out.
– Store them in the fridge for up to three days.
– For longer storage, wrap them in plastic wrap and put them in the freezer.
To enjoy them later, simply thaw them in the fridge overnight. This way, you can savor the deliciousness whenever you want!
This blog post covered how to make delicious Banana Pudding Rice Krispie Treats. We listed the simple ingredients and provided easy steps to create this tasty dessert. Don’t forget the tips for the best texture and serving ideas. Variations can add fun twists to your treats, and storage tips help keep them fresh. Enjoy making these treats that everyone will love. Each bite will remind you of classic banana pudding. Let’s get creating!
