MELTED RECIPES
where delicious ideas melt into life, from stovetop to backyard. Always warm, simple, and irresistibly satisfying. 🍳🔥🧀
BEST CATEGORIES
TRENDING
![- Fresh strawberries - Honey or maple syrup - Apple cider vinegar - Dijon mustard - Extra virgin olive oil - Salt and pepper For this tasty vinaigrette, you need: - 1 cup of fresh strawberries, hulled and halved - 1 tablespoon of honey (or maple syrup for a vegan choice) - 2 tablespoons of apple cider vinegar - 1 teaspoon of Dijon mustard - 1/3 cup of extra virgin olive oil - Salt and freshly ground black pepper, to taste You can make this vinaigrette vegan by using maple syrup instead of honey. If you want a sugar-free option, try using a sugar substitute like stevia or erythritol. These options let you enjoy the sweet taste without the sugar. To start, you need fresh strawberries. Wash them well, then hull and halve them. This step is key for a smooth dressing. Next, grab your blender. Add the strawberries, honey (or maple syrup), apple cider vinegar, and Dijon mustard into the blender. This mix will create a sweet and tangy base for your vinaigrette. Now, blend these ingredients on high speed. You want a smooth and even consistency. This should take about 30 seconds. Once blended, it’s time to add the olive oil. Keep the blender running and slowly drizzle in the olive oil. This helps the vinaigrette thicken and become creamy. Blend until it looks well combined. After you blend, stop and taste your vinaigrette. This is the fun part! Adjust the flavor with salt and freshly ground black pepper. Blend for a few seconds to mix in your seasoning. Now, carefully transfer your vinaigrette into a clean jar or airtight container. It’s best to refrigerate it for at least 30 minutes. This time allows the flavors to meld and develop. When you’re ready to serve, give the jar a good shake. Drizzle it over salads or use it as a dip for veggies. Enjoy your homemade strawberry vinaigrette! For the full details, check the Full Recipe. Store your homemade strawberry vinaigrette in a clean jar. Use an airtight container to keep it fresh. It lasts about one week in the refrigerator. Always check for any off smells before using. This vinaigrette pairs well with mixed greens, spinach, or arugula salads. You can also drizzle it over fruit salads for a sweet twist. It works great as a dipping sauce for fresh vegetables like carrots or cucumbers. For extra flavor, try adding fresh herbs like basil or mint. You can even mix in a pinch of black pepper or garlic powder. Balancing sweetness with acidity is key. If it's too sweet, add a splash more vinegar. If it’s too tart, mix in a bit more honey. Your taste buds will love the change! {{image_4}} You can switch up the fruit in your vinaigrette. Try mango for a tropical twist. Raspberries add a tart flavor that pairs well with salads. Blueberries give a sweet touch while keeping it fresh. Each fruit brings its unique taste, making your dressing exciting. Use whatever fruit you have on hand for a fun mix. Adding fresh herbs makes your vinaigrette special. Basil adds a sweet, peppery flavor. Mint brings a refreshing taste that brightens up your dish. You can mix basil and mint for a unique flavor combo. Just chop the herbs finely before blending them in. This small step transforms your dressing into something gourmet. You can control how thick your vinaigrette is. For a lighter dressing, add more vinegar or water. If you want it thicker, blend in more olive oil. Adjusting the thickness lets you customize it for different salads. A thicker dressing works well with hearty greens, while a lighter one is great for delicate leaves. Experiment until you find your perfect balance! For the complete recipe, check out the [Full Recipe]. Homemade strawberry vinaigrette is not just tasty; it is good for you too. Each serving has about 80 calories. You get healthy fats from the olive oil, which helps your body absorb nutrients. The strawberries add natural sweetness and vitamins. They are low in calories but high in fiber. Strawberries are rich in vitamin C, which helps keep your skin healthy. They also have potassium, which is good for your heart. This vinaigrette provides a fresh taste while packing in nutrients. This vinaigrette is gluten-free. You can enjoy it without worry if you avoid gluten. It is also vegan-friendly. You can swap honey for maple syrup to keep it plant-based. This makes it a great choice for many diets. Olive oil has many benefits. It contains healthy fats that can help lower bad cholesterol. Vinegar adds flavor and may help control blood sugar levels. Both olive oil and vinegar can aid digestion and support overall health. Strawberries are full of antioxidants. Antioxidants help fight free radicals in your body. This can lower your risk of some diseases. Eating strawberries can support heart health and improve your immune system. By using this homemade strawberry vinaigrette, you enjoy a treat that is both delicious and healthy. Check out the Full Recipe to make your own! Homemade strawberry vinaigrette lasts about one week in the fridge. To keep it fresh, store it in an airtight container. Always check for any changes in smell or color before using. Yes, you can freeze strawberry vinaigrette. Pour it into ice cube trays for easy use later. Once frozen, transfer the cubes into a freezer bag. This way, you can thaw small amounts as needed. You can use strawberry vinaigrette beyond salads. Try it as a dip for fresh fruit or veggies. It also works well as a glaze for grilled chicken or fish. Drizzle it over roasted vegetables for a sweet touch. Strawberry vinaigrette is relatively low in calories. One serving has around 50 calories, depending on the amount of olive oil used. It is a lighter option compared to many creamy dressings. Enjoy it without the guilt! Homemade strawberry vinaigrette is simple and delicious. We explored key ingredients, including fresh strawberries, apple cider vinegar, and olive oil. I provided step-by-step instructions, tips for storage, and serving ideas to enhance flavors. Consider variations with different fruits or herbs to make it your own. This vinaigrette offers nutrition and health benefits. Enjoy making it, knowing you have a tasty and healthy option for salads and more. Your meals will shine with this bright, flavorful dressing.](https://meltedrecipes.com/wp-content/uploads/2025/07/5155774f-5c9f-4d68-9873-68d2d42535ef.webp)

NEW RECIPES
Parmesan Garlic Beef Bowtie Pasta Delicious Meal Delight
Looking for a tasty, easy meal that feels like a hug in a bowl? Look no further! My Parmesan Garlic Beef Bowtie Pasta is a

Coconut Lime Chicken Tacos Flavorful and Fresh Meal
Get ready for a flavor explosion with my Coconut Lime Chicken Tacos! This dish combines juicy chicken thighs and zesty lime with creamy coconut milk,
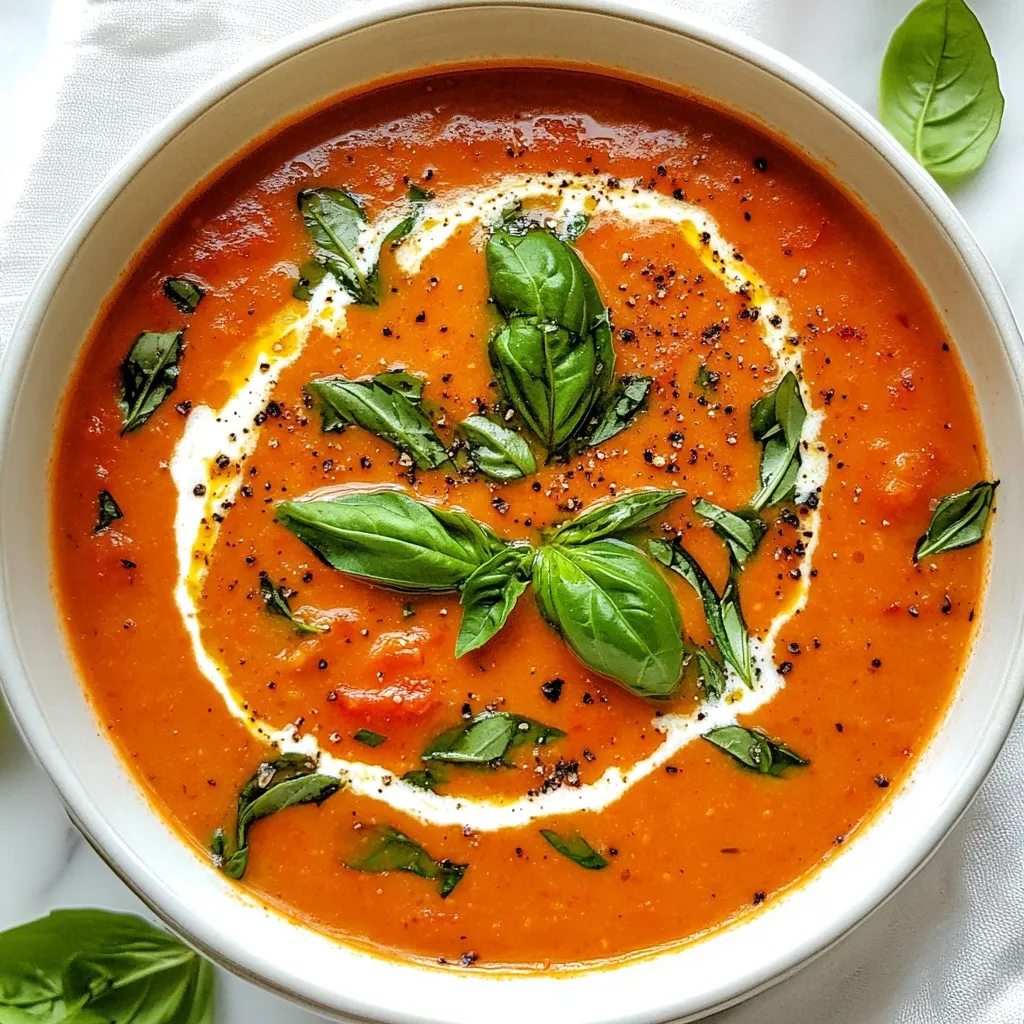
Instant Pot Creamy Tomato Basil Soup Delight
Are you ready to elevate your soup game? This Instant Pot Creamy Tomato Basil Soup is rich, flavorful, and easy to make. Imagine vibrant fire-roasted

Thai Coconut Curry Noodles Simple and Tasty Recipe
If you crave a cozy, flavorful meal, you’ve come to the right place. Thai Coconut Curry Noodles are not only simple to make, but they

Classic Chicken Pot Pie Comforting Family Meal
Are you craving a warm, hearty meal? Look no further! This Classic Chicken Pot Pie is your ticket to comfort. With tender chicken, crisp veggies,

Garlic Butter Baked Chicken Breast Juicy and Flavorful
Are you ready to savor a dish that’s both juicy and bursting with flavor? My Garlic Butter Baked Chicken Breast recipe will transform your dinner

Air Fryer Teriyaki Salmon Bites Easy Weeknight Meal
Craving a quick and delicious weeknight meal? Look no further! In this post, I’ll show you how to make Air Fryer Teriyaki Salmon Bites that

Teriyaki Chicken Stir Fry in 20 Minutes Recipe
Looking for a quick and tasty meal? This Teriyaki Chicken Stir Fry takes just 20 minutes! You’ll love how easy it is to make a